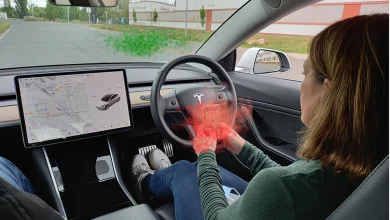
A test drive should never be treated as a casual spin around the block with the radio turned up and the salesperson directing your route. For most car shoppers, excitement or subtle pressure from the seller leads to an emotional, unfocused drive. Professional vehicle inspectors approach the process with a methodical mindset, viewing the test drive as an active diagnostic session rather than a joyride.
Modern cars do an exceptional job of masking serious wear and tear beneath slick interior finishes and fresh detail jobs. Slipping transmissions, worn suspension bushings, blown head gaskets, and hidden electronic faults rarely reveal themselves during a gentle cruise at twenty-five miles per hour. To protect your investment, you must systematically evaluate the vehicle across every operational phase, starting long before you ever shift into gear.
Cold Start Verification and Pre-Drive Visual Checks
The test drive begins under the hood before the engine turns over for the very first time. Sellers and dealerships occasionally warm up a problematic vehicle prior to an inspection because warm engines start easier, idle smoother, and conceal telltale noises or exhaust smoke.
-
Feel the Hood and Valve Cover: Place your hand flat on the vehicle hood or directly touch the engine manifold. If it feels warm to the touch, the car was run recently. Request that the vehicle sit until completely cool, or take note that you missed the crucial cold-start assessment.
-
Inspect the Fluid Reservoirs: Pull the engine oil dipstick and verify fluid level and color. A milky, frothy residue indicates coolant mixing with oil, often pointing to a cracked block or blown head gasket. Inspect the brake fluid, power steering reservoir, and automatic transmission dipstick if accessible. Burnt-smelling transmission fluid suggests internal friction plate damage.
-
Examine Belt and Hose Health: Look for cracking, dry rot, fraying, or soft, spongy coolant hoses. Signs of dried white or green residue indicate chronic minor leaks that worsen under operating pressure.
-
Tire Tread and Suspension Gaps: Uneven tire tread wear across an axle reveals alignment trouble, bent tie rods, or worn control arm bushings. Check the clearance between the tire and the fender lip to ensure the car sits level across all four corners.
Starting the Vehicle and Static Electronics Audit
Turn the ignition key to the run position without starting the engine. Every instrument cluster warning light, including the check engine, antilock braking system, and airbag lights, must illuminate. If a specific warning light fails to turn on during the initial system check, an unscrupulous seller may have removed the bulb or disconnected the cluster trace to hide active fault codes.
Start the engine with the driver door or window open. Listen intently for clicking, valvetrain ticking, high-pitched belt squeals, or deep metallic knocks from the lower end of the engine block. Note how quickly the starter motor turns and whether the idle settles into a smooth, consistent rhythm within sixty seconds.
While sitting parked, test every interior electronic component:
-
Climate Control Systems: Switch the air conditioning to maximum cold, verify compressor engagement, and switch between floor, dash, and defrost vents. Run the heater to maximum to confirm the heater core operates without a sweet, sickly coolant smell filling the cabin.
-
Power Windows, Locks, and Mirrors: Cycle every window up and down from the master driver switch as well as individual door switches. A slow or stuttering motor indicates a failing regulator.
-
Infotainment and Safety Equipment: Test the backup camera, parking distance sensors, wiper speeds, hazard lights, turn signals, and high beams.
-
Steering Play While Stationary: Gently rock the steering wheel back and forth while looking at the front wheels. There should be immediate wheel response with zero dead space, knocking, or binding sounds from the intermediate steering shaft.
Low-Speed Maneuvers and Transmission Engagement
Before heading toward traffic, spend ten minutes in an empty parking lot or a quiet residential street. Keep the radio and air conditioning fan completely off, and leave a window cracked slightly so your ears catch exterior chassis noises.
Shift firmly between Park, Reverse, and Drive several times while holding your foot firmly on the brake pedal. The engagement must occur smoothly within one to two seconds. A harsh clunk, aggressive shudder, or prolonged delay points toward worn transmission mounts or slipping internal solenoids.
Steering and Drivetrain Diagnostics at Low Speeds
-
Full-Lock Figure Eights: Turn the steering wheel fully to the left lock and slowly drive in circles, then repeat fully to the right lock. Listen for rhythmic clicking or popping noises, which signify worn constant velocity joints on front-wheel-drive or all-wheel-drive platforms.
-
Suspension Rebound on Speed Bumps: Drive over standard parking lot speed bumps at five to ten miles per hour without applying the brakes directly on top of the bump. The chassis should rebound once and stabilize immediately. Multiple bounces, harsh metallic banging, or squeaks signal blown shock absorbers or degraded sway bar links.
-
Creep Test: On flat ground, shift into Drive, release the brake pedal without touching the accelerator, and see if the vehicle creeps forward on its own power smoothly. Repeat this procedure in Reverse.
Dynamic On-Road Evaluation
Once basic systems pass initial checks, transition to a route that combines urban stop-and-go streets, uneven surfaces, and a high-speed highway stretch. Plan this driving route yourself ahead of time rather than letting a seller guide you along their carefully curated, smooth route.
Accelerating and Highway Cruising
Merge onto an open highway and depress the accelerator firmly to roughly three-quarters throttle. Observe how cleanly the transmission kicks down through gears. The gear shifts should feel crisp, decisive, and free of RPM flares, where the engine revs skyward momentarily before catching the next gear.
At sixty to seventy miles per hour, hold a steady speed and assess cabin noise and stability:
-
Vibrations Through the Seat vs. Steering Wheel: A vibration isolated purely to the steering wheel indicates front-end tire balance or bent wheel issues. A vibration felt through the seat frame or cabin floor generally points to rear-wheel balance, a warped driveshaft, or damaged carrier bearings.
-
Tracking and Drift: On a straight, level stretch of pavement, loosen your grip on the steering wheel slightly. The vehicle should track straight for several seconds without pulling hard toward the shoulder or oncoming traffic.
-
Wind and Weatherstrip Seals: Listen for excessive whistling or howling sounds around the windshield header, A-pillars, and door seals, which often point to improper glass replacement or door frame misalignment from past collisions.
Stress-Testing the Braking System
Safe braking requires linear pedal travel, even clamping force, and balanced hydraulic pressure across all four corners.
Find a safe, deserted stretch of road and perform three deliberate braking checks:
-
Gentle Slowdown: Apply light pedal pressure from forty miles per hour down to ten miles per hour. Pay attention to pulsating sensations in the brake pedal or steering wheel, which confirm warped brake rotors or sticking caliper slide pins.
-
Moderate Hard Stop: When safe and clear of following traffic, apply firm, deliberate pressure to bring the vehicle to an aggressive stop without fully locking the wheels. The vehicle must track in a straight line without diving hard to the left or right, which indicates a seized caliper or collapsed rubber brake hose.
-
Antilock Braking Engagement: On a safe, wet, or gravel patch, execute an intentional panic stop to trigger the antilock braking system. You should feel rapid pulsing through the pedal and hear the hydraulic modulator cycling without warning lights illuminating on the dash.
Post-Drive Examination Under the Hood
The inspection is not complete when you switch off the ignition. Immediately after parking, leave the engine running, set the parking brake, and open the hood once more.
-
Examine for Fresh Leaks: High oil and coolant pressures developed during the drive will force fluids out of compromised gaskets. Look for active drips, pooling liquid around the cylinder head mating surface, or steam coming from the radiator crimp seams.
-
Sniff for Problematic Odors: Walk around the vehicle to check for distinct odors. A pungent burning oil smell indicates leaking valve cover gaskets dripping onto exhaust headers. A sulfur or rotten-egg odor indicates an overheating, failing catalytic converter. An acrid electrical smell demands immediate investigation of the alternator and primary wire harnesses.
-
Listen to the Cooling Fan Operation: Verify that the electric radiator cooling fans cycle on properly to maintain temperature while stationary.
-
Scan for Stored Diagnostic Trouble Codes: Plug an onboard diagnostic scanner into the vehicle port beneath the dashboard. Verify that all emissions readiness monitors have cleared, confirming the seller did not clear active trouble codes right before your arrival to temporarily extinguish the check engine light.
Frequently Asked Questions
How long should a thorough used car test drive take from start to finish?
A proper test drive should take at least thirty to forty-five minutes. This allows sufficient time for a complete cold pre-inspection, fifteen minutes of varied city and parking lot checks, fifteen minutes of sustained highway driving to bring all engine, transmission, and differential fluids up to full operating temperature, and a final post-drive mechanical check.
Can I legally take a used car to an independent mechanic during a test drive?
Yes, reputable dealerships and private sellers routinely permit pre-purchase inspections by third-party mechanics during an extended test drive. You should arrange this inspection with your mechanic in advance, notify the seller beforehand, and expect to provide a copy of your valid driver license and proof of insurance to the seller before departing.
What does it mean if a seller insists on driving the car themselves during the test?
If a seller refuses to let you drive the car from behind the wheel, treat it as an immediate warning sign. Sellers who insist on driving often attempt to manage the throttle, avoid specific gear ranges, or dodge handling situations that reveal major transmission slipping, steering play, or braking defects.
How can I detect if an automatic transmission is beginning to slip during a test drive?
Transmission slipping is most noticeable when accelerating up a modest incline or demanding sudden passing power on the highway. If the engine revolutions climb abruptly without a proportional increase in vehicle forward momentum, the transmission clutches or torque converter are slipping and nearing mechanical failure.
Is it normal for a used car engine to make ticking sounds on startup?
While some modern direct-injection high-pressure fuel pumps produce a subtle, steady clicking sound, loud or metallic ticking that persists after the engine warms up is abnormal. It frequently indicates collapsed hydraulic lifters, excessive valvetrain clearances, worn cam phasers, or critically low oil pressure starvation in the upper cylinder head.
How can I tell if a used car has sustained hidden structural frame damage while driving?
Vehicles with unibody or frame damage often exhibit continuous pulling to one side that standard alignment adjustments cannot correct. You may also notice uneven tire wear across the inner edges of the tires, strange crabbing or dog-tracking behavior where the rear wheels do not follow the path of the front wheels, or significant creaking through the center door pillars over road bumps.
What should I do if a dashboard warning light flickers on and off during the drive?
Any intermittent warning light indicates an active electrical short, failing sensor, low fluid condition, or mechanical system falling outside permissible thresholds. Do not dismiss a temporary light as a harmless glitch. Connect an onboard diagnostic tool immediately to extract both active codes and pending historic fault codes stored within the vehicle memory modules.